Code Editor
You can choose any editor you want VS Code, WebStorm IDE, Sublime Text or even Vim.
We recommend using VS Code. Install VS Code.
Creating a File
- Launch VS Code. Type code in command line interface prompt or search bar (the most common CLI commands).

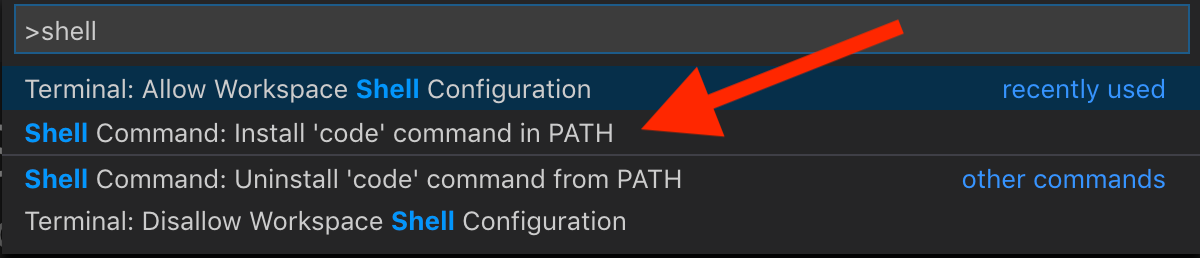
Pro tip: In the terminal, you can simply type code . to launch VS Code
in the current folder. To set up this terminal shortcut in macOS, open up VS
Code, and use cmd + shift + p to open Search. Type in shell, and install
the 'code' command.

Use your code editor to write some JavaScript code. Type the following:
a = 'hello'console.log(a)Save your file as
test.jsin any folder you decide.
Running JavaScript Code On Computer
Now that you have your code, you need to run it with a program called
node.js.
Download the latest stable version of node.js, a program to run JavaScript. If you're using Windows install Windows Subsystem for Linux first and follow instructions for Linux from now on.
- For companies that use
node, the best practice is to use nvm to install node.js. - Install nvm.
- use
nvmto install node version 14 by typing into your terminal:nvm i 14.
- For companies that use
Open your terminal and use
cdto go to the folder that contains your file.Run your file using node:
node test.js.You should see the output
hello.
Browser-based setup
If you don't want to install node locally you use run javascript code in your browser. Go to GitPod. You'll be asked to create an account or you can also login using a Github account.
Running HTML Code on the Browser
Sometimes, you want to test something really quick and you are simply too lazy to create a new file. You can also write some quick code on the browser and immediately run it.
- Open your browser, then right-click on the browser, then click on
Inspect ElementorInspect(Firefox and Chrome).

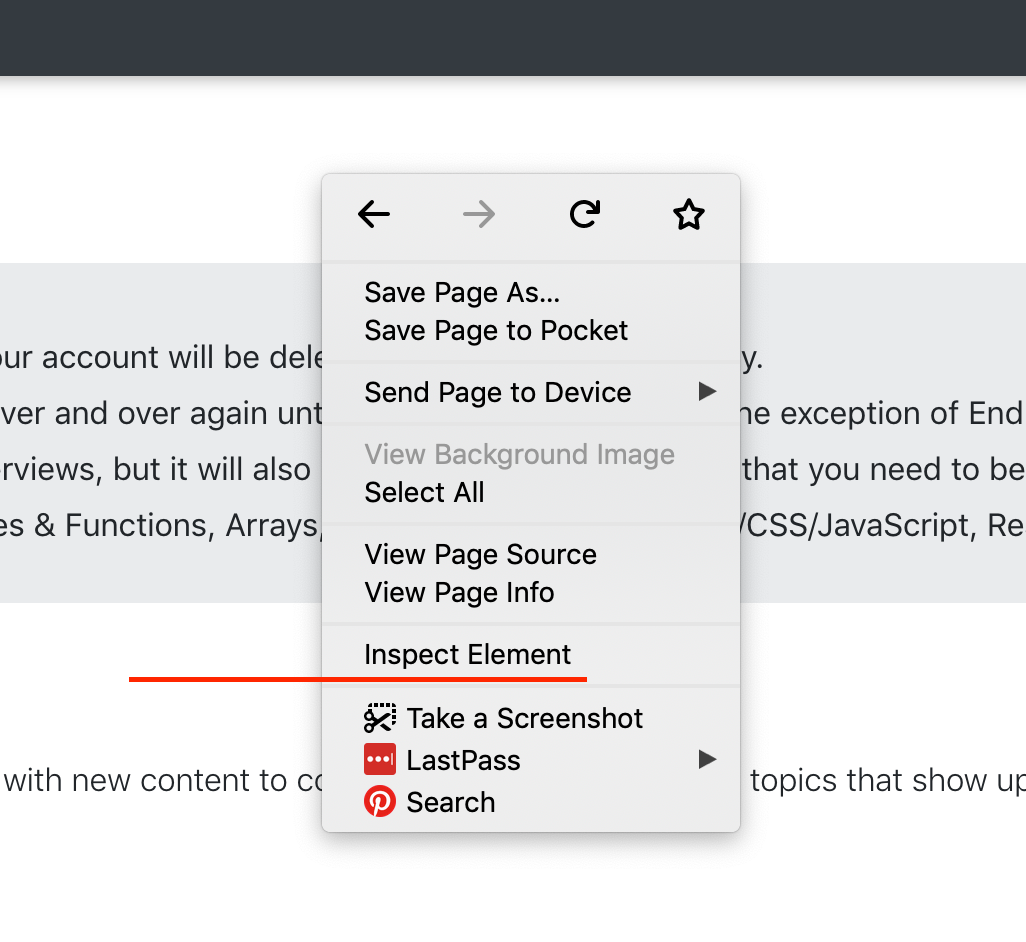
- In the screen that appears, click on the
Consoletab:

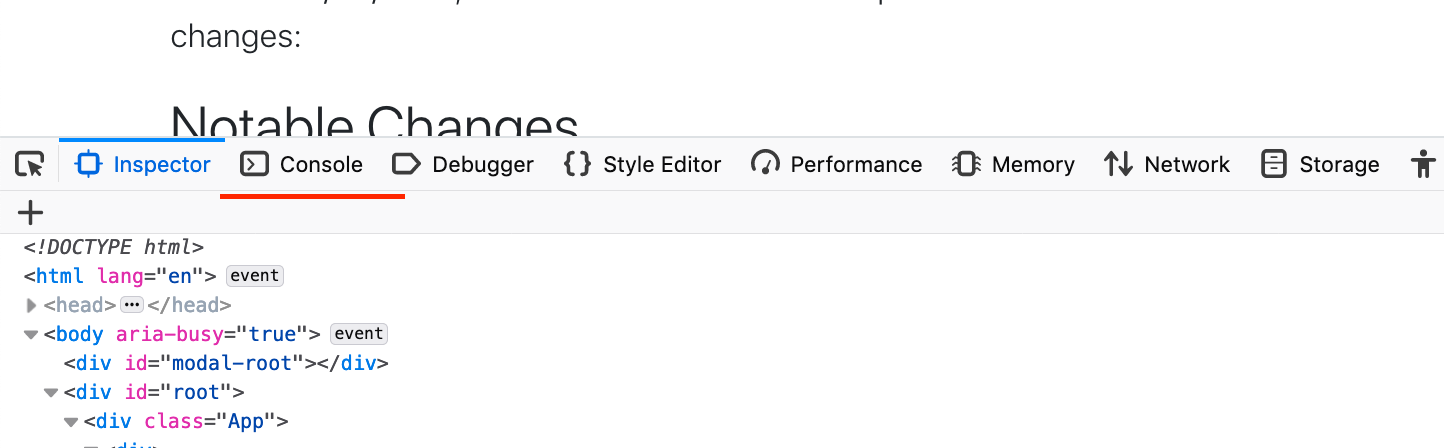
After that, you can start typing code! For now, type
console.log("hello"). And then type enter key.To write code on multiple lines, you must type Shift + Enter (only Enter for Windows).
Alternatively, you can run node directly from terminal. Type node to start
node REPL (read–eval–print loop).
Running HTML Code from VS Code
Once you have completed writing and saving your HTML code on a file name xxxx.html, you are ready to run the html code on a browser. The easiest way is to run it directly from VS Code. However, before you can run the html code, you will need to install the open in browser extension by techER.
Launch VS Code.
For Mac users: Click on Code → Preferences → Extensions. Or use [shift] + [command] + [x] keys.
For window users: Click on File → Preferences → Extensions. Or use [Ctrl] + [Shift] + [X] keys.
Enter open in browser in search box, and then select open in browser by techER. Install the extension.
While you are in VS Code, edit your html file. For window users, right click and select View in Browser. For Mac users, press [control] key and click and select Open in Default Browser, or press [option]+[B] keys.
Your default browser will be launched with your html file running.
Submitting Challenges
You can skip this section and come back when you finish JS 0 - Foundations.
Create an account on c0d3.com/signup if you don't already have one.
For most of the steps below, you will be typing the commands into the terminal.
These steps are the same set of instructions you will most likely follow at work. Each challenge you solve is simulating building a feature at work.
If this is all new to you, these steps may seem very intimidating. When you start a new job, you will be equally intimidated because of all the specific tools each company uses. It is important to ask questions when you feel overwhelmed, there will be people on the chatroom help answer your questions.
Local Setup
When you join a software engineering company, the first step is setting up your machine, downloading the codebase, and setting up the codebase. (video instructions)
After installing
node, install c0d3 CLI (used to submit challenges):npm i -g c0d3.If you run into a
Missing write access ... EACCESerror, you need to run npm with sudo:sudo npm i -g c0d3.Install git and familiarize yourself with common git commands.
Install yarn by running
npm install -g yarn.Use git to clone the curriculum into your machine:
git clone https://github.com/garageScript/curriculum.Go into the curriculum root folder by typing
cd curriculum.Download the necessary libraries by running
yarn install.
Browser Setup
Alternatively, you can submit challenges straight from your browser.
- Go to GitPod. You'll be asked to create an account or you can also login using a Github account.
- After your workspace is created, you'll have most of the tools you need at
your disposal (
git,node,npmandyarn). You'll need to install only the c0d3 CLI tool used to submit the challenges, by typingnpm i -g c0d3on the terminal at the bottom of the screen. Note: every time your workspace is restarted you'll need to run this command again. - After installing the CLI tool, type
c0d3 loginand enter your C0D3 account credentials to be able to submit the challenges. - Now the only thing remaining is to download the necessary libraries by
running
yarn install.
Solving Challenges
git status is your best friend. It tells you what branch you are currently on
and which files are changed and/or staged for commit.
Solving each challenge is like building a feature at work. You must always
checkout checkout master before creating a new branch to work on a new
feature.
Branch names: Usually branch names are for your own eyes only, so you do not have create branches with meaningful names.
Note: Except for steps 3 (reading the challenge) and 4 (open and editing the file), all the commands should be run in the terminal
Make sure you are on the master branch:
git checkout master.Create a new branch from master (pro tip:
p1for problem 1):git checkout -b p1.Go to c0d3.com, click on Curriculum, select lesson 0, and read challenge 1.
Write the solution by opening, editing, and saving
js0/1.js(means file 1.js inside folder js0).Test your file by running
npm run test. (Make sure tests are passing 100%) You will have to typeqorCTRL cto get out of the test script.Add and commit changed files. Do not commit
package-lock.jsonfile.git add js0/1.js→ stages the file to be saved.git commit -m "solves problem 1"→ saves the changes.If you forget to put
-m, you will be put into vim. To get out, type:wqto save and exit.The commit message (the text that comes after
-m) should be present tense and describe what the change does.If you do
git statusand see changes to the filepackage-lock.jsonoryarn-lock.json, you would also commit these changes at work. These files lock in the version of the libraries used to run your files. However, to make reviews for your submission easier, do not commit changes to these files.
Submit your solution:
c0d3 submit- Note: You will be prompted to choose the exact lesson and challenge you are currently submitting. You should select lesson 0 and problem 1.
- Go back to your student page (c0d3.com → Curriculum → lesson 0), refresh it, and see the solution you just submitted!
Go back to step 1 and repeat for the next challenge.
Make sure you go back to STEP 1 and run git checkout master so you are on
master branch before creating a new branch so you can start the next problem
fresh. If you don't then you will be creating a new branch from existing branch
and all your solutions will be piled up together.
If you accidentally made a commit to your master branch, you need to undo
the commit.
- Undo the last commit:
git reset HEAD~. - Go to the branch for your problem (we will use
p1as an example):- If the branch does not exist, you need to create one:
git checkout -b p1. - If the branch exists, you can just switch to it (by omitting the
-boption):git checkout p1.
- If the branch does not exist, you need to create one:
- Continue with step 6 and onwards (add and commit).
Getting Feedback
As a software engineer, after submitting a feature you will wait for other software engineers to review your code.
Similarly, after submitting your solution, your solution will be reviewed by other engineers to make sure you are following best practices in your code.
You should be able to see your submissions when you go to the Curriculum and selecting a lesson.
It can take some time for a mentor to review your code. Feel free to go to JS0-Foundations chatroom to request a review.
If your code is not following best practices, your submission will get rejected. The following steps will help you resubmit.
Example: Problem 5 is rejected.
- Go to the branch that has the commit for problem 5:
git checkout p5(if your branch was called p5). - Open and edit the file
js0/5.jsand address the comment you received. - Add and commit changed files:
git add js0/5.js→ stages the file to be savedgit commit -m "fixes problem 5 suggestion"→ saves the changes
- Submit your solution again:
c0d3 submit.
Completing your submission
As a software engineer, you need to merge your code back into your master
branch after the code has been approved.
When all of your submissions have been approved, you need to follow these steps (video instructions):
- Go to the master branch:
git checkout master.- If you have done this correctly, you will notice that all of the your solutions are missing. This is because your solutions are on different branches and we need to merge them in.
- Merge your branch containing the solution to problem 1 (we will use
p1as example) into your existing (master) branch:git merge p1.- By doing this,
masterbranch will now have your solution to challenge 1.
- Merge your branch containing problem 2 solution (we will be using
p2as an example) into your existing (master) branch:git merge p2.- By doing this,
masterbranch will now have your solution to challenge 2.
- Continue merging the remaining branches into
master.- At this point,
mastershould have all the approved solutions to all the challenges in this lesson.
- At this point,
To check if you did everything correctly go to p1 (or any other challenge
branch) and type git diff master. It should not print anything, meaning
there is no difference between your branch and master.
Reusing your branches
- Go to an existing branch that you plan to use for problem 1 (e.g.
p1)git checkout p1- (Notice how we did not add a
-bflag because we are not creating a new branch)
- (Notice how we did not add a
- Update this branch with all the code in master:
git merge master - Write the solution by opening and editing
js1/1.js - Test your file by running
npm run test(make sure tests are passing 100%) - Add and commit changed files
git add js1/1.jsgit commit -m "solves problem 1"→ saves the changes- If you forget to put
-m, you will be put into vim. To get out, type:wqto save and exit.
- If you forget to put
c0d3 submitto upload your work to c0d3.com for code review
- Start from step 1 and repeat for the next challenge
Next Step
Congratulations! You have written your first JavaScript program and you know how to run code directly in the browser. Now you are ready to start your journey.
Edit this page on Github